After visiting the baking show I decided I would try and bake more so I looked at the bag of goodies, I was given at the show, for some inspiration. On the back of the Muscovado sugar was a webpage with plenty of exciting new recipes but I settled with this one below:
http://www.billingtons.co.uk/recipes/billingtons-brownies/
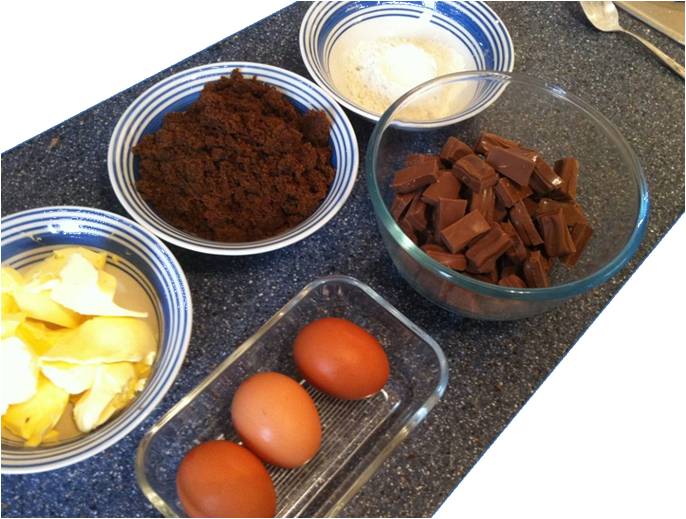
Now I have never baked brownies before (cookies yes, but brownies no) so this seemed like the perfect idea. The only thing I didn’t like about the recipe was the idea of cherries and dark chocolate, both of which I hate, so I opted for no cherries and a delicious bar of milk chocolate (Galaxy, not for sharing!). I also made sure to get a little extra than the allocated 350g to account for unintentional snacking.
Next step was to weigh out the ingredients and place in individual bowls (while I wouldn’t do this usually it does mean I can photograph all the ingredients together). Then I fetched out ‘old trusty’, which is my mixing bowl I’ve had since my uni days, and began adding in the eggs. I added the eggs in one by one in case any shell fell in and I had to fish it out. Next I got a pan of water boiling and placed a bowl over the top (this is known professionally as a bain-marie) and began adding in the butter and chocolate. You may want to this in batches depending on the size of your bowl. I then whisked up my eggs and whisked in the sugar (with a balloon whisk).

After the butter and chocolate had melted down I then folded in the chocolate mixture with a wooden spoon (I fold by drawing a figure of eight with my wooden spoon). I then sieved in the flour and gave it a final mix (again by drawing a figure of eight). It’s important not to just stir a cake mix and actually fold in the ingredients as this will give the cake air and make for a lighter cake. Even though the recipe called for a 20cm square tin it didn’t specify the depth and I believe I definitely needed a deeper tin!
(See the picture below).
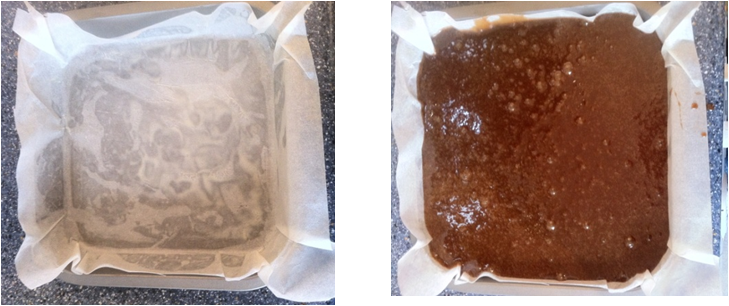 I then lined the pan by first getting a little bit of butter and wiping it around the tin this then helps the grease proof paper stick to the tin and makes it a little easier to pour in the cake mixture.
The oven should already be pre-heated, as instructed in the recipe, so the brownies are ready to go in. I do know you should generally follow instructions but my oven gets a bit burny when it gets to temperatures of 180c and above so I reduced the temperature to 160c. This did mean I ended up cooking the brownies for an hour though. It wasn’t too bad as it gave me time to clean up the mess I had made in the kitchen.
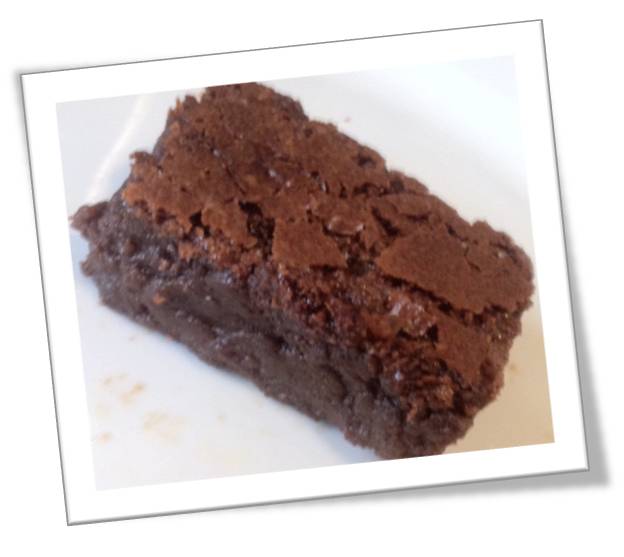
I also came to realise I don’t know how to tell if a brownie is cooked but I soon learned you can just poke the cake with a skewer, as usual, but apparently the cocktail stick can be messy but it just needs to be dry ( This means it’s a moist brownie but my skewer came out clean anyway). I also do realise I keep referring to brownies as cakes but I suppose they would be more related to biscuits but this is all rather controversial; Whoever said the baking world was dull eh!
Brownies are delicious on their own but they can also be served with a splash of cream or alternatively broken up into chunks and added to ice cream to mimic a well known ice cream product.